|
|
Post by grunt on Apr 1, 2011 1:16:01 GMT -5
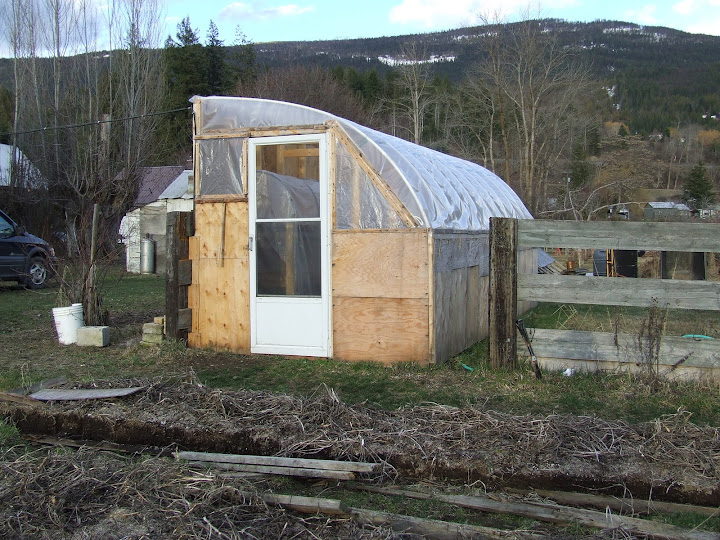
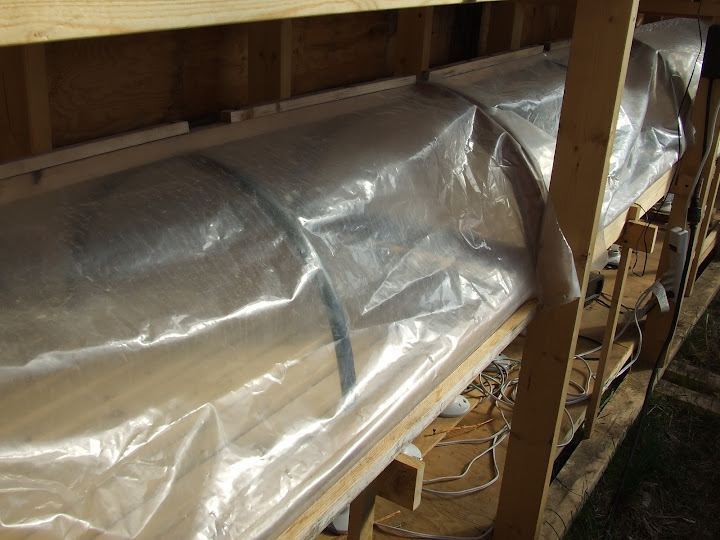
I finally built (overbuilt) myself a greenhouse.  The back wall uses a pre-existing fence as a basic framework = I do not have to worry about the wind shifting this thing. I decided to remove the necessity for using my starting chambers freestanding. This cover over the shelves gives me one more layer of insulating air to protect plant starts, and to hold the heated air on the plants and seed trays.  The top shelf starts getting used once the seeds have sprouted. The heated air can go up the stud spaces at the back of the shelf, and up the front of the shelves behind the plastic.  The canopies from my original starting chambers have been altered to fit the middle shelves, and hold more heat on the seed trays.  The middle shelves are slats, to allow the heated air to flow up easily, and supply bottom heat to the trays.  This is what supplies heat for the plants. I am running 60 watt bulbs now, because I am having a hard time finding 100 watt bulbs. It just means I have to add a few bulbs to attain the same heat. With 3 bulbs under each section, I will be using 720 watts to keep my plants alive at night = less than the low setting on my heater, and it will cover more effectively. Not all of the bulbs shown are in use. I can still put plant trays down here if necessary.  The first 16 trays on the bench have potting soil in them.  I'll probably remove about half of these shelves, but they seemed like a good idea at the time.  My pit crew.  |
|
|
|
Post by steev on Apr 1, 2011 11:35:56 GMT -5
Oh-oh, envy attack.
|
|
|
|
Post by cortona on Apr 1, 2011 14:10:51 GMT -5
green henvy..lol fantastic work! admired ! and last but not last..i wil probably copy some particular from it in the future!
|
|
|
|
Post by galina on Apr 1, 2011 16:51:54 GMT -5
This is a seriously nice seed and seedling greenhouse. Beautifully constructed. The double insulation should keep everything really warm. Nice job!  |
|
|
|
Post by bunkie on Apr 2, 2011 12:07:33 GMT -5
awesome setup dan! love your pit crew! i see your paartner's working hard through the greenhouse door, too! good for her!
|
|
|
|
Post by garnetmoth on Apr 2, 2011 19:28:31 GMT -5
sweet. Where can we borrow one of you around here?
|
|
bertiefox
gardener
   There's always tomorrow!
Posts: 236
|
Post by bertiefox on Apr 3, 2011 3:16:00 GMT -5
A great set up but I wonder why you use light bulbs rather than tubular heaters which should be far more economical to run and aren't expensive to buy, at least not over here. Nearly a kilowatt of power is a heck of a lot on a cold night! An excellent project though which gives us all ideas, especially the multi-layers for plant starting.
|
|
|
|
Post by grunt on Apr 3, 2011 12:55:28 GMT -5
I googled tubular heaters after reading your post. We don't seem to have them on this side of the water. I am currently using 2 X 60W bulbs per 4 foot section, so consumption is 480 W for the full row. I can heat the air under just one 4 foot section for 120 W, if I want to do just a portion of the row. My electricity is approx. $0.08 KW, so it only costs me about $0.70 a day to heat the greenhouse (12 hours/day). The lights also gives me a visible indication that the heat is on.working
|
|
|
|
Post by synergy on Apr 3, 2011 13:04:51 GMT -5
Wow, I have seen greenhouses before but never one specifically to start seeds. It makes a big impression on newbie, there is no way I am going to be anywhere nearly proficient for a few years.
Well I will try to learn a bit, you sort of bent the pvc but have a structure . I am struggling to figure out some sort of poly hoop structure for a few of my gardening beds . So think I need to do some searching to get ideas how people do them.
|
|
|
|
Post by grunt on Apr 3, 2011 13:30:31 GMT -5
There are some examples of what yu can do in the albums at picasaweb.google.com/TVgrunt/2008SEEDSTARTINGand picasaweb.google.com/TVgrunt/HoophouseThe board sides on the beds are not required = just push stakes into the ground to anchor your hoops. Anything can be used for hoops = if you have access to free lumber of appropriate dimensions, you can make square or A frame equivalents to the hoops, just cover sharp parts to protect the plastic. Heavy wire, or pipe that can be bullied into the appropriate shape will work too. I put a tarp over the hoop houses at night, to give an extra air pocket on the sides for insulation. It gave me about 9 degrees of protection, with a 900 W heater in each 30 foot hoop house. As soon as danger of frost is over, the tarps are put away, and the heaters removed. Net result, your plants are already hardened off when you transplant. |
|
|
|
Post by grunt on Apr 3, 2011 18:58:40 GMT -5
I will put some supports for the lights in at a later date, to hold them off the shelf, so I can still put plants there if need be. It won't hurt the starting trays to have the lights a little closer to them, to increase the bottom heating effect for germination.
I want to leave the front of the heater shelf open, in case I do need the space for plants (which I likely will later).
I will see if I have some spare plywood kicking around = It wouldn't hurt to temporarily close off the front of the heater shelf, to concentrate the heat a bit to get germination.
|
|
|
|
Post by wildseed57 on Apr 8, 2011 13:16:55 GMT -5
Really nice Dan, that should give you enough growing space to start quite a few plants.
George W.
|
|
|
|
Post by bunkie on Jun 18, 2011 13:04:58 GMT -5
hey dan, jus wanted to let you know we had 100 percent germination on the Guido Toms this year...remember last year, i think it was, we had zero. progress!!! ;D
|
|
|
|
Post by grunt on Jun 18, 2011 22:54:29 GMT -5
Bunkie: Glad to hear it was a one-off occurrence. I think perhaps last years seeds fermented a bit too long.
There are a few minor changes in the greenhouse since the prior photos. I'll try to get some pics tomorrow.
|
|