Post by oxbowfarm on May 4, 2014 8:03:57 GMT -5
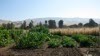
In the course of a recent discussion with trixtrax we got on the topic of Speedling trays and I said I would post some pictures of my homemade popper for extracting the seedlings. These are not the best pictures, but I seem to have lost several other pics I took, so I may add more.
Essentially it is a bed of nails. For the 200 cell Speedling tray that I use, you obviously need to buy 200 60d nails. I then cut the nails to approx. a 3 inch length with an angle grinder with a metal cutting wheel and bevel the cut edge of the remaining nail slightly on a bench grinder to remove the burs and sharp edges.
For the face plate of the popper you must carefully lay out a grid on some 1/2" plywood that determines where the nails will protrude from the board. Then you drill very carfully each hole using a drill press and a brad point twist bit. The layout of the grid and the careful drilling of the holes is the most crucial step to making a popper that will actually work. I have several pieces of plywood full of holes that were failed attempts when i tried to get quick and dirty with this process. Drilling the holes free-hand doesn't work, use a drill press. Also, I found using an ordinary twist bit will result in the point wandering a lot. Brad point bits are highly recommended for doing this. The center point gets you a much more stable and accurate hole, even with a drill press.
After you drill your holes, pound all your nails you've cut into the face plate and lay the faceplate on another sheet of 1/2" ply with the heads sandwiched between the two plates and screw them together with many short deck screws. Your popper is done.
To use it, place your Speedling tray over the popper and align the drain holes with the nails. Wiggle the tray down onto them till the plants pop up. It helps if the tray has been watered recently but isn't still draining water.